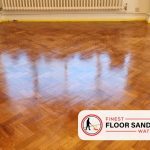
Step into the world of craftsmanship and enhance your home with a beautifully restored staircase. Each step of the staircase will blend together perfectly to create a masterpiece that exudes strength and elegance.
Embark on this transformative journey with our comprehensive guide to sanding and restoring your staircase in the United Kingdom.
This article, driven by technical expertise, delves deep into the meticulous field of carpentry. It provides detailed explanations of the tools, materials, and techniques needed for this task. We emphasize the importance of thorough preparation, precise measurements, and careful execution to achieve the desired results.
Drawing from years of practical experience in working with wood, we share valuable insights and time-saving methods to overcome common challenges. Our hands-on approach ensures that each step is executed with power and expertise.
Let us guide you as you breathe new life into your staircase. Together, we will reveal its true potential and leave a lasting impression of grandeur in your home.
Allow us, Finest Floor Sanding Watford, prepare you for a journey that embodies strength and empowers you to master the art of restoration.
Assess the condition of your staircase
Now it’s time to take a closer look at your staircase and see what needs to be done. Staircase repair and renovation require technical expertise, attention to detail, practicality, and experience-based knowledge.
As a skilled carpenter or woodworker, you understand the importance of thorough preparation to achieve optimal results. Begin by assessing the condition of each step, checking for any loose or damaged parts. Inspect the handrail, balusters, and newel posts for stability and structural integrity. Identify areas that require sanding to remove old finishes or imperfections in the wood. Pay close attention to corners, edges, and intricate details that may need extra care during the restoration process.
By carefully evaluating your staircase’s condition before proceeding with repairs or renovations, you can ensure a successful outcome.
Now let’s move on to gathering the necessary tools and materials for this project.
Gather the Required Tools and Materials
When renovating a staircase, it is important to gather the necessary tools and materials for the task. You will need sanding equipment like a belt sander or an orbital sander, as well as different grades of sandpaper to achieve a smooth finish.
Consider the options of stain or paint that will enhance the beauty of the wood or provide a desired colour scheme. Do not forget to use protective finishes and sealants to ensure that your restored staircase remains durable.
Taking the time to carefully choose these items will help you achieve the professional results you desire.
Sanding tools and materials
To achieve a fresh appearance for your staircase, you will require some essential sanding tools and materials. Here are a few items that will assist you in achieving professional-quality outcomes:
Random orbital sander: This versatile tool is perfect for removing the old finish and smoothing out any imperfections on the wooden surface. Ensure that you select a sander with adjustable speed settings to accommodate different types of wood.
Sandpaper in various grits: Begin with a coarse grit (around 40 or 60) to eliminate the existing finish, then gradually progress to finer grits such as 80, 120, and finally 220 for a polished finish. Different types of wood may necessitate different grits, so experimentation is necessary to determine what works best.
Sanding blocks or pads: These handheld tools are ideal for reaching small corners and edges that may be missed by the orbital sander. Use them in conjunction with the appropriate grit sandpaper for thorough sanding of every corner.
Now that you have your sanding equipment prepared, let’s proceed to explore options for staining or painting your staircase transformation.
Stain or paint options
If you want to give your staircase a fresh new look, explore the stain or paint options available to bring out its true beauty and enhance its overall appearance.
When it comes to deciding between stain and paint, there are numerous factors to consider. Stain is a great choice if you want to highlight the natural grain of the wood and achieve a more rustic or traditional look. It comes in a wide range of colours, from light oak to rich mahogany.
On the other hand, paint offers endless possibilities for customisation. You can choose any colour that suits your style and complements your home’s decor. Whether you go for a classic white or a bold statement colour, painting your staircase can completely transform its look.
As you decide between stain and paint, think about the desired aesthetic and how it will fit into your overall design scheme.
Moving on to protective finishes and sealants…
Protective coatings and sealants
Enhance the beauty of your staircase with protective finishes and sealants that will guarantee its long-lasting durability and show off its true elegance. Here are four reasons why investing in protective finishes and sealants is essential for your staircase:
Application Techniques: Perfecting application techniques is crucial for achieving a flawless finish. Whether it’s brush strokes or spray application, each technique requires precision and skill.
Types of Protective Finishes: There are various types of protective finishes available, such as polyurethane, varnish, and lacquer. Each finish offers unique advantages like scratch resistance, stain resistance, or fade resistance.
Benefits and Drawbacks of Sealants: Sealants create a protective barrier against moisture and wear. However, some sealants may darken the wood or require frequent reapplication. Make a wise choice based on your desired aesthetics and maintenance preferences.
Choosing the Right Sealant: Consider factors like the type of wood used in your staircase, amount of foot traffic, and desired level of protection when selecting a sealant. Seek advice from professionals or conduct research to make an informed decision.
Now that you understand the importance of protective finishes and sealants, let’s move on to preparing your staircase for sanding without compromising its structural integrity.
Prepare Your Staircase for Sanding
To completely transform your staircase into a smooth and stunning masterpiece, you will need to prepare it for sanding.
Before you start, use a vacuum or brush to remove any dirt, dust, or debris.
Thoroughly examine each step for any signs of damage, such as cracks, chips, or loose boards.
If you find any damaged steps, fill the gaps with wood filler and secure loose boards with screws or nails.
By taking the time to properly clean and repair your staircase before sanding, you will achieve a flawless finish that will last.
Now that your staircase is clean and repaired, you can proceed to the sanding process.
Sanding Your Staircase
Now that you’ve prepared your staircase for sanding, it’s time to begin the actual sanding process. This step is crucial in achieving a flawless finish on your staircase. Here are some expert tips and techniques to assist you:
Start with coarse-grit sandpaper (around 60-80 grit) to eliminate any existing finishes, stains, or imperfections.
Progress to finer grits (120-220 grit) for a smoother surface.
Use a random orbital sander or a sanding block for consistent and even results.
Always sand in the direction of the wood grain to prevent scratches and achieve a uniform finish.
By following these sanding techniques and tips, you’ll be well on your way to restoring your staircase to its former magnificence.
In the following section, we will explore the important steps of finishing and restoring your staircase, leaving no details overlooked.
Finishing and Restoring Your Staircase
To achieve a stunning transformation, it’s time to discover the secrets of bringing back the timeless beauty of your staircase through the art of finishing and restoring.
Staircase refurbishment is a meticulous process that requires careful attention and skill in wood restoration. Before starting, gather all the necessary tools such as sandpaper, wood stain, varnish, and brushes.
Thoroughly sand the entire staircase to remove any existing finish or damage. Work in small sections and follow the grain of the wood for the best results.
Apply a coat of wood stain evenly across each step and railing, allowing it to dry completely before applying a protective layer of varnish. This will enhance the natural beauty of the wood and provide long-lasting durability.
To maintain and take care of your restored staircase, regularly clean it with a soft cloth or a vacuum attachment to prevent dust from accumulating and maintain its pristine appearance.
Maintain and Care for Your Restored Staircase
Caring for your restored staircase is essential in maintaining its timeless appearance and ensuring its durability. To help you keep your staircase looking pristine, here are some maintenance tips and preventive measures to consider:
Regular cleaning: Dust and dirt may accumulate on your staircase over time, so make sure to clean it consistently using a soft cloth or a vacuum cleaner attachment.
Protective coatings: Apply a protective finish to the wood surface of your staircase to guard against scratches, stains, and moisture damage. This will help preserve its appearance and prevent potential harm.
Avoid excessive weight: Be mindful of heavy objects or furniture that could potentially damage the stairs. Consider using furniture pads or sliders to minimize any impact.
Inspect for wear and tear: Regularly check your restored staircase for any signs of wear or damage. Address any issues promptly by repairing or replacing damaged parts.
By following these maintenance tips and taking preventive measures, you can ensure that your beautifully restored staircase remains in excellent condition for years to come.
Frequently Asked Questions
How long does it usually take to sand and restore a staircase?
On average, it can take anywhere from several days to a couple of weeks to sand and restore a staircase, depending on its size and condition. High-quality sandpaper should be used for best results, and even pressure should be applied throughout.
It’s important to take care when filling cracks or repairing any damaged areas. By following the necessary steps, you can ensure your staircase is restored with accuracy and efficiency.
Can I utilise a power sander in place of manual sanding?
Yes, you can use a power sander instead of sanding by hand. It is a popular choice among woodworkers and carpenters due to its efficiency and time-saving capabilities. Power sanders offer a quicker and more consistent sanding process, enabling you to achieve a smooth finish with less effort. However, caution and skill are required to prevent over-sanding or damaging the wood. To ensure a smooth finish, select the appropriate grit level for your project and keep the sander moving in even strokes across the surface.
What type of wood filler should I use to repair any damaged areas on my staircase?
To fix any damaged sections on your staircase, you will need to select the appropriate wood filler. Epoxy-based wood fillers are a common option because they are durable, strong, and have a good bond with the wood, resulting in a long-lasting repair.
Begin by cleaning and preparing the damaged area. Next, use a putty knife to apply the filler, ensuring that it is level with the surrounding wood.
Lastly, complete the restoration process by sanding and refinishing.
Is it essential to remove the current finish on my staircase before sanding?
Before starting the sanding process, it is important to remove the existing finish on your staircase. Think of it as a blank canvas for an artist – you want a fresh start to achieve the best results. Chemical strippers can be helpful for this task as they can effectively break down the old finish, making it easier to remove.
To minimize dust while sanding, consider using a vacuum attachment or a damp cloth while working. Focusing on attention to detail and practicality will ensure that your staircase restoration is nothing less than impressive and breathtaking.
How frequently should I reapply a protective finish in order to keep the restored staircase looking good?
To maintain the beauty of your restored staircase, it is important to regularly apply a protective coating. The frequency of reapplication depends on various factors, including the type of coating used, the amount of foot traffic on the stairs, and the environmental conditions.
In general, it is suggested to reapply the protective coating every 2-3 years. This will help to protect your staircase from damage and maintain its restored appearance.
If you enjoyed our article then please do let us know or if you need any flooring services, then check out our services: